
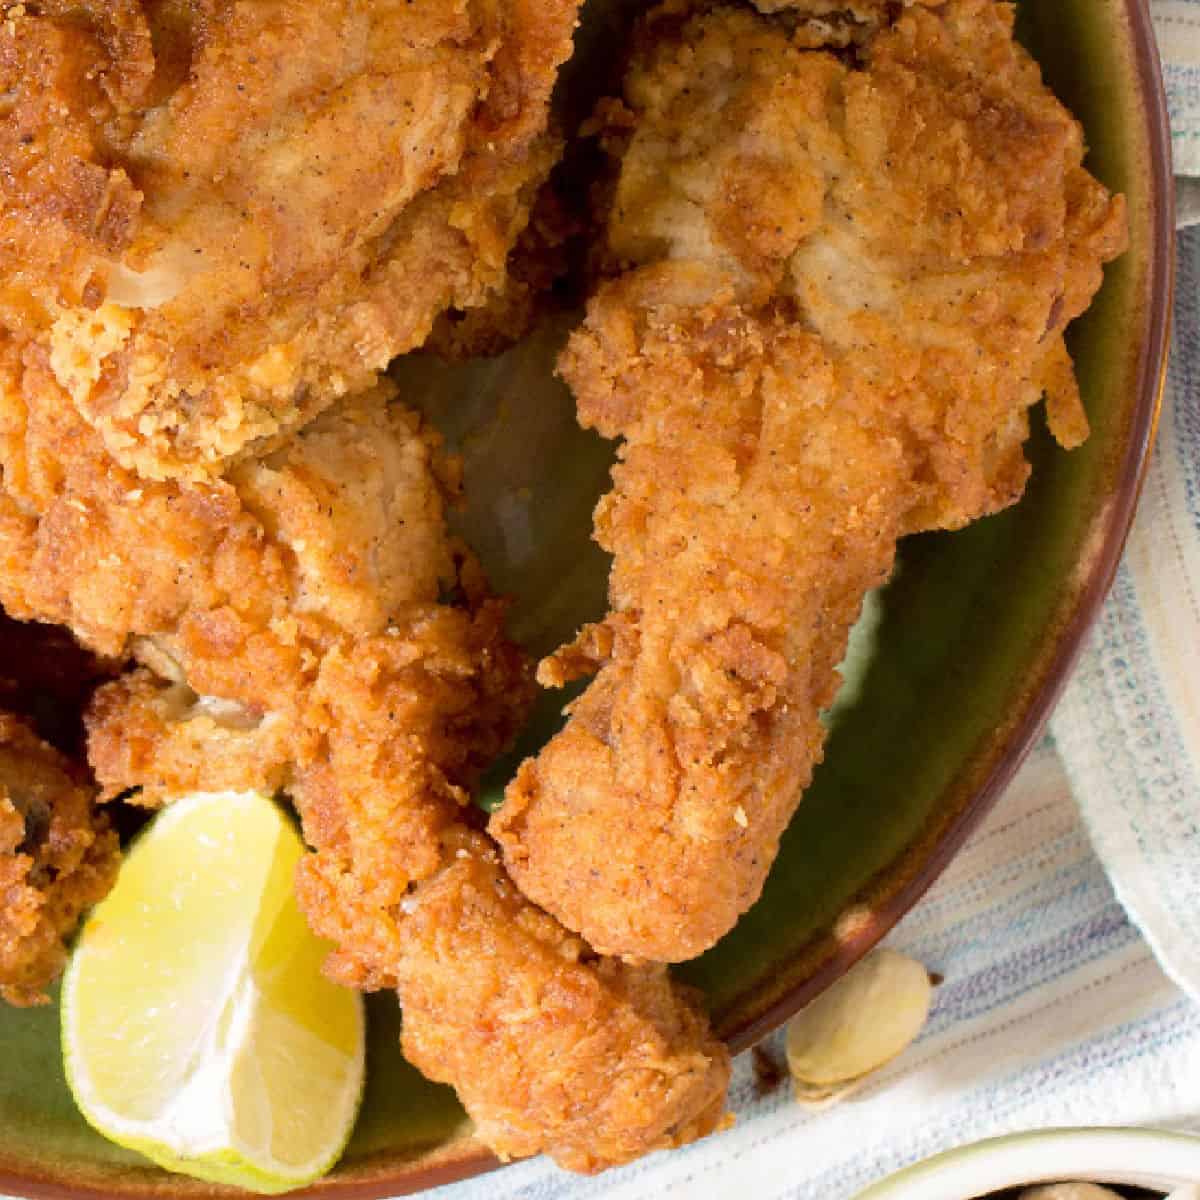
Craving crispy, juicy fried chicken but cooking for one? This easy pan-fried chicken drumstick recipe is perfect for solo diners seeking comfort food without the leftovers. Using simple ingredients and a cast-iron skillet, you can achieve golden-brown perfection in no time.
Pair it with our Small Batch Onion Rings or Homemade Potato Salad for a complete meal. For dessert finish the meal with a mini cherry pie.
Would you like to save this recipe?
Ingredients You Need
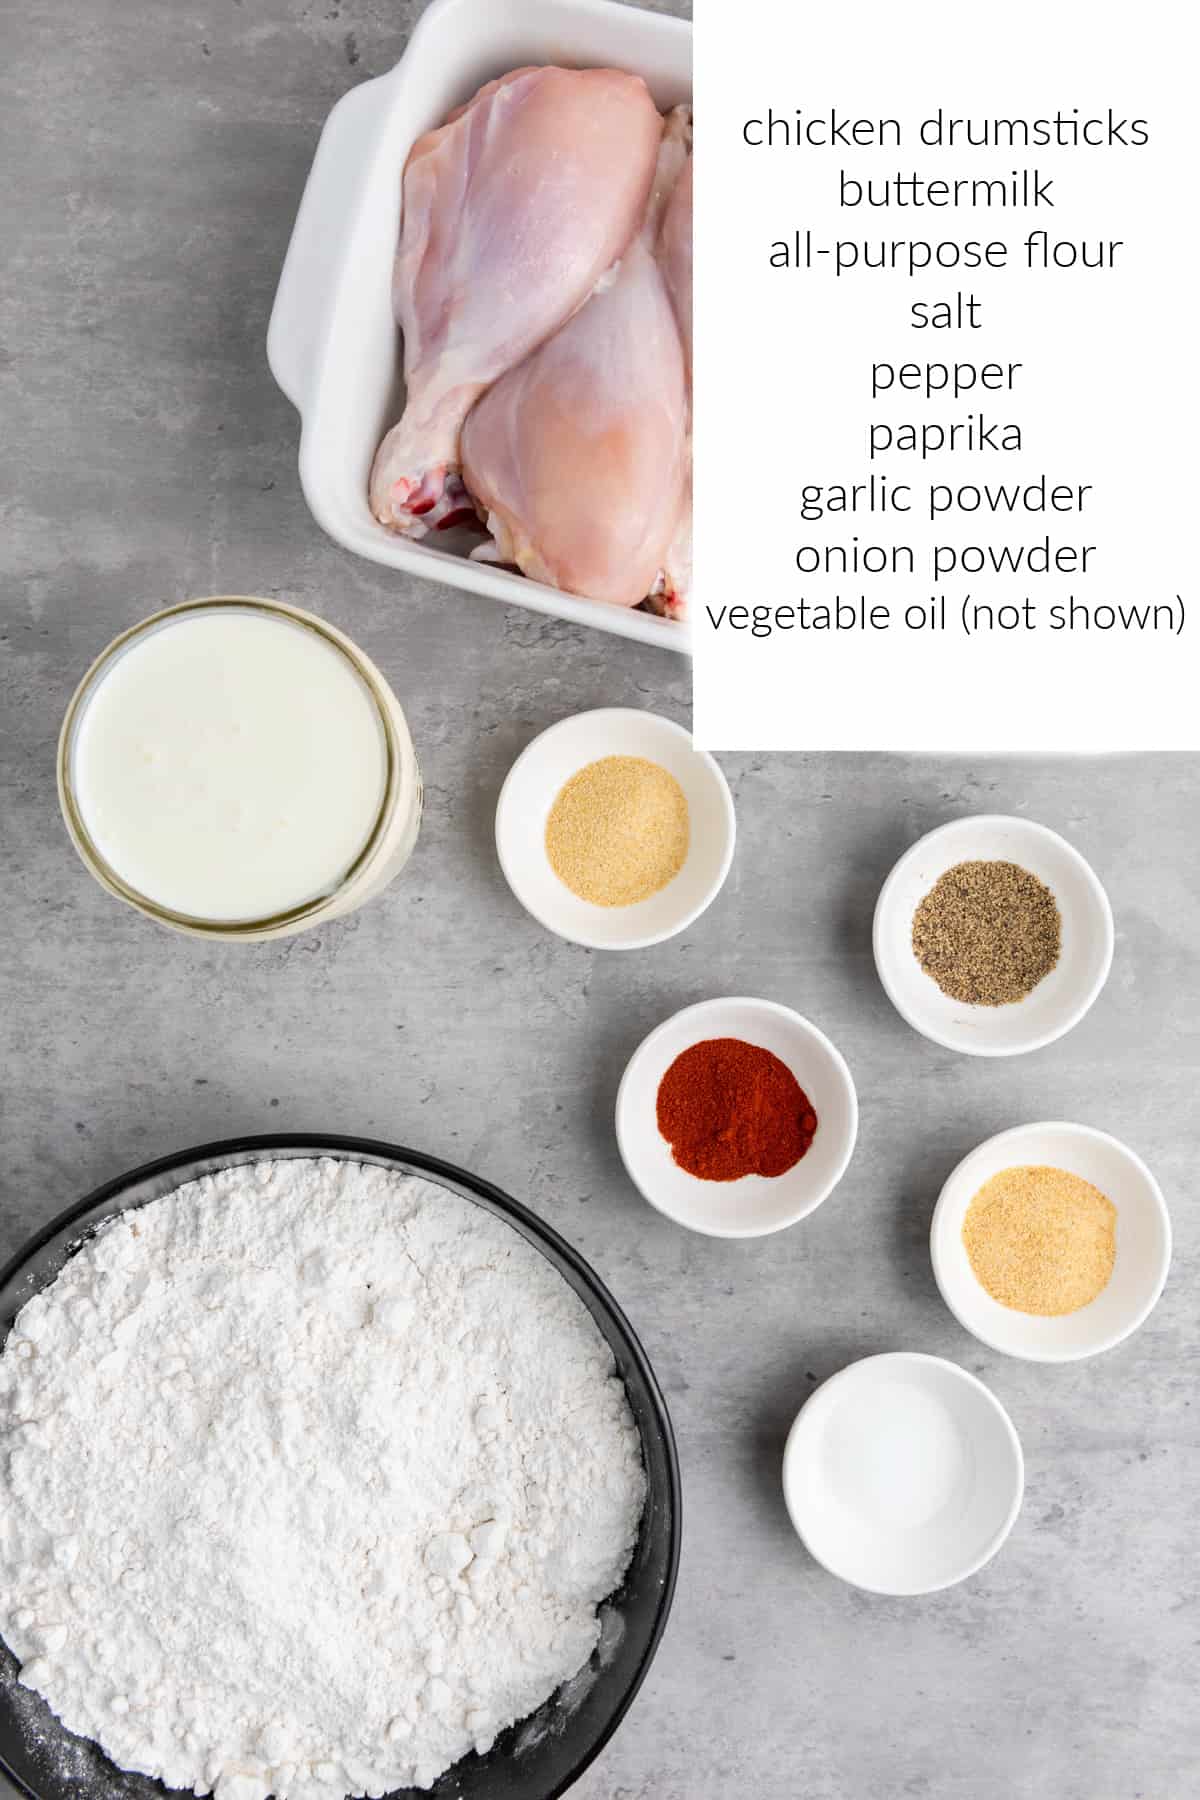
Ingredients
- 3 chicken drumsticks
- ¾ cups all-purpose flour
- ¾ cups buttermilk
- ½ teaspoon paprika
- ½ teaspoon garlic powder
- ½ teaspoon onion powder
- ⅛ teaspoon salt
- ½ teaspoon pepper
- Vegetable oil for frying
Step-by-Step Instructions
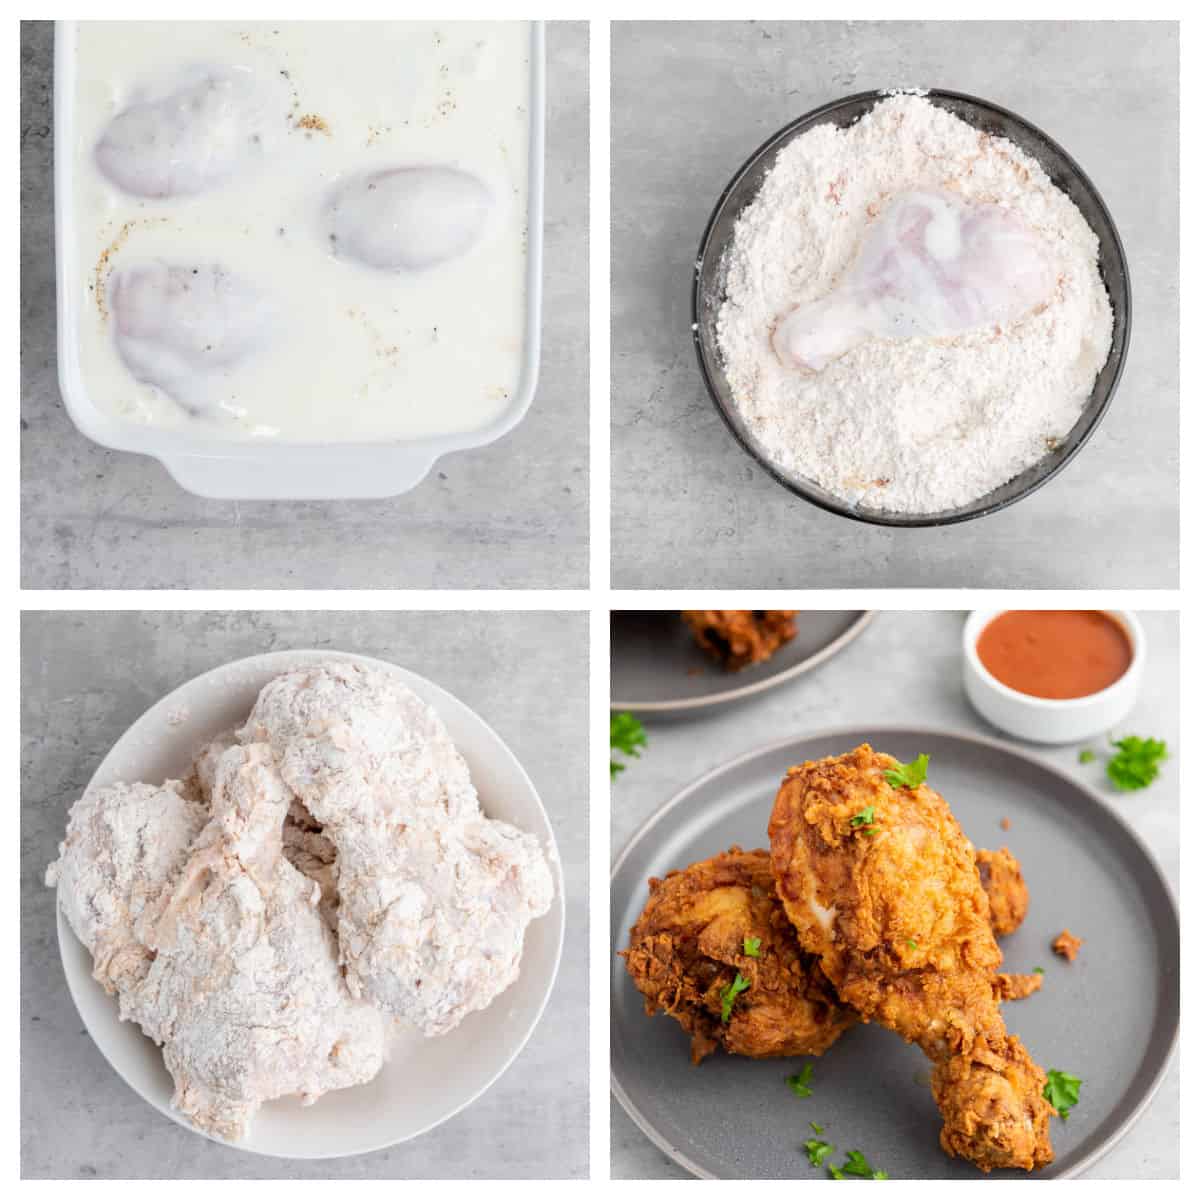
- Prep the Chicken: Pat the drumsticks dry with paper towels. Place drumsticks in a shallow bowl or large Ziploc bag, pour the buttermilk over the chicken. Make sure the chicken is submerged in the buttermilk. Refrigerate and chill for 2 hours.
- In a bowl or plate, combine flour, paprika, garlic powder, salt, and pepper.
- Coat the Chicken: Place the flour and seasonings in a shallow dish. Roll each drumstick in the seasoned flour mixture, ensuring an even coat.
- Cook the Chicken: Heat oil in a skillet (cast iron recommended) over medium-high heat. You will need about an inch deep of oil, the quantity will vary depending on the size of pan you use.Add drumsticks and cook for about 5-6 minutes per side until golden brown and cooked through (internal temperature of 165°F).
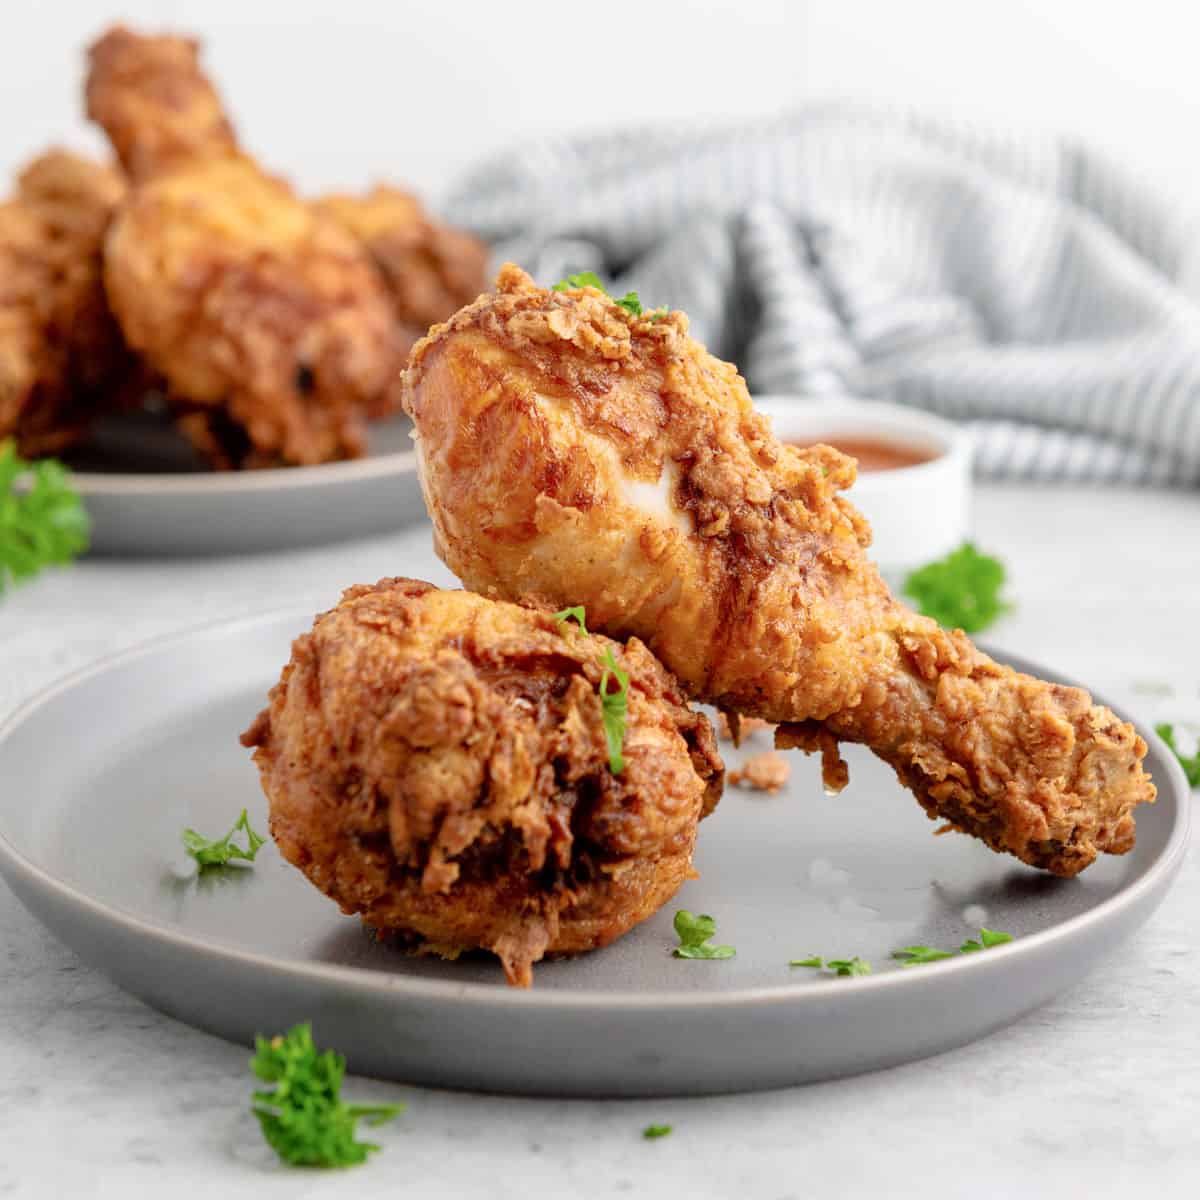
- Rest and Serve: Let the drumsticks rest on a paper towel-lined plate for a few minutes before serving to maintain crispiness.
Notes on vegetable oil for frying chicken
- Oils: Use an oil with a high smoke point. Crisco typically has a smoke point of around 360°F to 370°F making it suitable for various cooking methods, including frying and sautéing, where high temperatures are required. It’s my choice for frying chicken, it’s what my Dad used and I’m familiar with cooking with Crisco.
Storage and Reheating
Store leftovers (if any!) in an airtight container in the refrigerator for up to 2 days. Allow the fried chicken to cool to room temperature for about 30 minutes after cooking. This helps prevent condensation inside the storage container.
Reheat in a 375°F oven for 10-12 minutes or until warmed through to retain crispiness. Avoid using the microwave, as it can make the skin soggy.
Tips for Perfect Pan-Fried Chicken Drumsticks
- Dry Chicken: Pat chicken completely dry to achieve crispy skin.
- Even Heat: Maintain medium heat; too high will burn the coating, too low won’t crisp it.
- Chicken Temperature: Always use a meat thermometer to ensure the chicken reaches 165°F internally.
- Oil Temperature: Use a heavy-bottomed pan with a thermometer to maintain a consistent oil temperature. The ideal frying temperature for chicken is around 350-375°F (175-190°C).
- Heavy Skillet: Use a skillet large enough to prevent the chicken from touching.
FAQs
To achieve a crispy crust, pat dry the chicken thoroughly before breading it. When cooking, maintain a consistent oil temperature of around 350-375°F (175-190°C) and avoid overcrowding the pan when frying.
Use a meat thermometer to check the internal temperature of the chicken. It should reach 165°F (74°C) to ensure it’s fully cooked and safe to eat. Additionally, the chicken should have a golden-brown color on the outside.
For the best fried chicken, use bone-in, skin-on chicken pieces like thighs, drumsticks, or breasts. The bone and skin add flavor and moisture to the dish.
Buttermilk Fried Chicken Drumsticks
Ingredients
Recipe Directions
- Pat the chicken drumsticks with a paper towel to remove excess moisture.
- Place drumsticks in a shallow bowl or large Ziploc bag, pour the buttermilk over the chicken. Make sure the chicken is submerged in the buttermilk. Refrigerate and chill for 2 hours.
- In a medium bow bowl, mix the flour, paprika, garlic powder, onion powder, remaining salt, and pepper to make a seasoned flour mix.
- Take the chicken out of the buttermilk, letting excess liquid drip off. Roll the drumstick in the flour mixture and coast all sides of the chicken. Lightly press the flour into the chicken to make sure it sticks and you get a crispy skin.
- In a medium size heavy skillet (cast iron works great) Heat vegetable oil 350-375°F. You need about an inch of oil in the pan, use a cooking thermometer to make sure the oil is hot enough.
- Use tongs to carefully put the coated chicken pieces in the hot oil and fry for 12-15 minutes until they're golden brown, crispy, and cooked inside. You will need to turn the chicken over once to get all sides cooked and browned. The chicken should reach 165°F inside.
- Use a slotted spoon or tongs to remove the fried chicken and place them on paper towels to remove extra oil. Let cook a few minutes before serving.
Would you like to save this recipe?
Nutrition
Notes
- Choose the right chicken: Use bone-in, skin-on chicken pieces like thighs, drumsticks, or breasts for the best flavor and juiciness.
- Seasoning: Season your chicken with a mix of salt, pepper, and other preferred spices or herbs. Let it sit for a while to allow the flavors to penetrate the meat.
- Drying the chicken: Pat the chicken dry with paper towels to remove excess moisture. This helps in achieving a crispy exterior.
- Breading: Make sure to season your flour mixture , don’t skimp.
- Temperature control: Use a a heavy-bottomed pan with a thermometer to maintain a consistent oil temperature. The ideal frying temperature for chicken is around 350-375°F (175-190°C).
- Don’t overcrowd the pan: If you are only frying 3 Drummsticks use an 8-inch skillet to avoid any overcrowding the pan, which can lead to uneven cooking and less crispy results.
- Drain excess oil: Place the fried chicken on a wire rack or paper towels to drain excess oil and maintain its crispiness.
- Resting time: Allow the fried chicken to rest for a few minutes before serving. This helps retain the juiciness and allows the crust to set.