
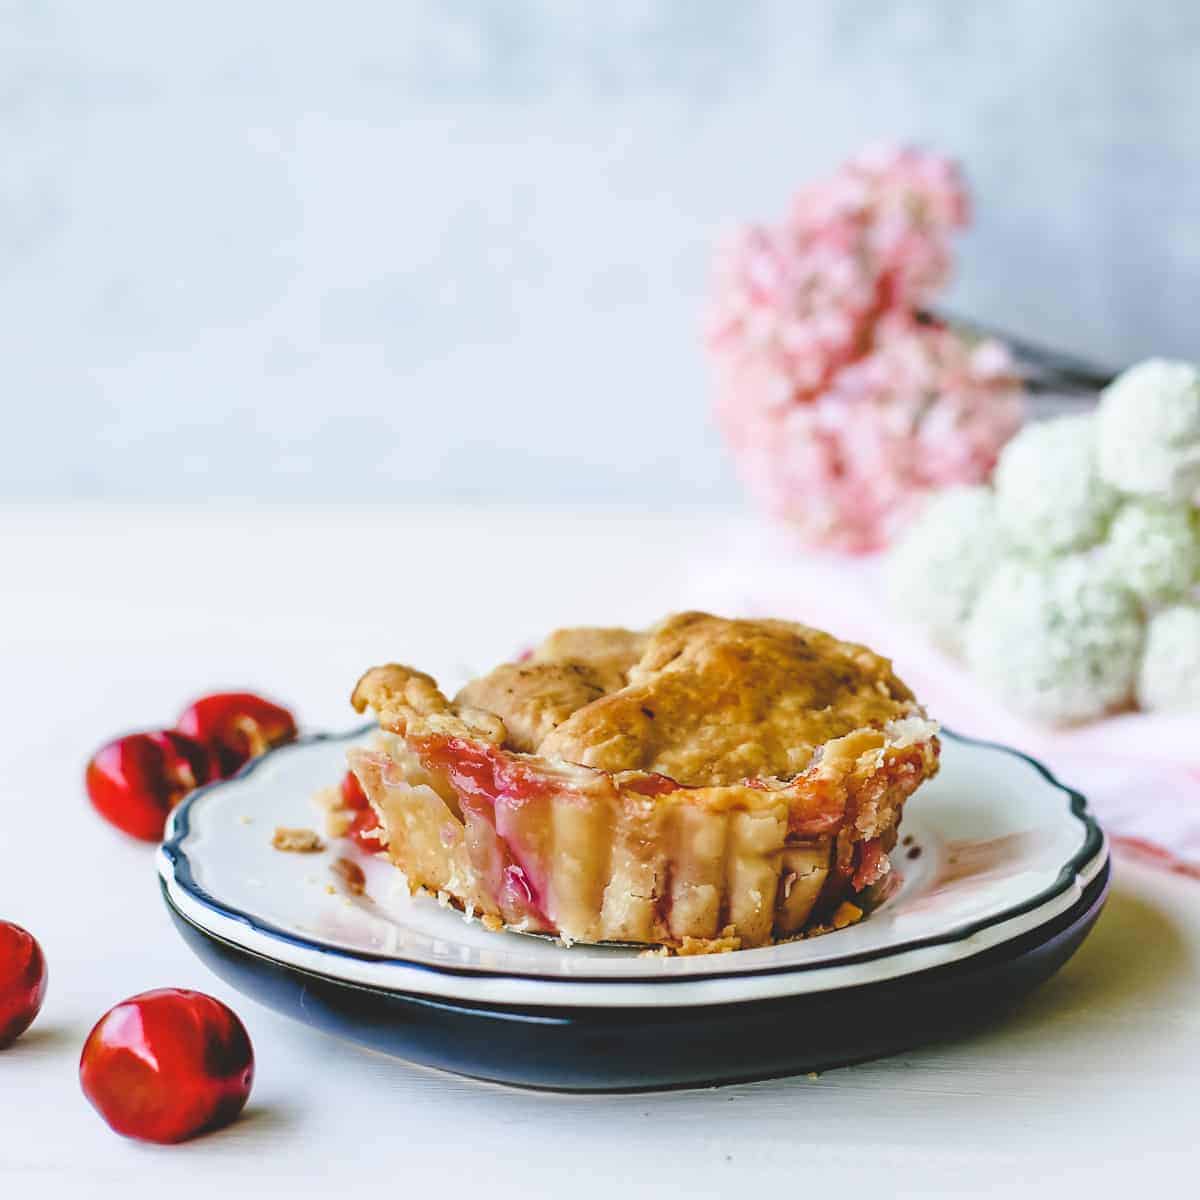
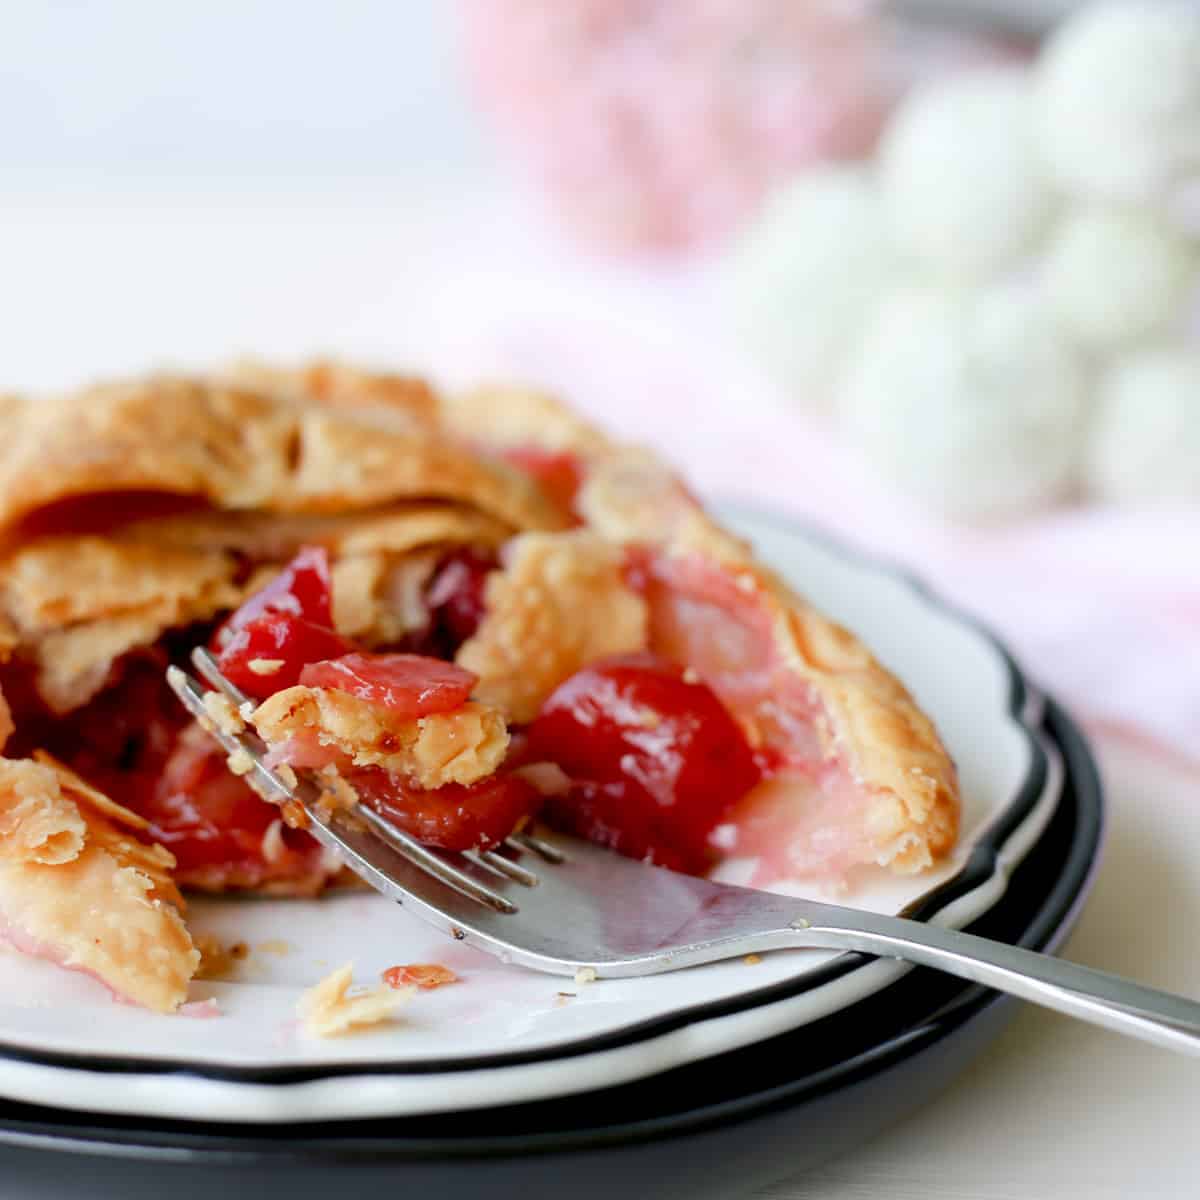
A mini cherry pie is the perfect anytime dessert. Made with fresh cherries the flavor will take you back in time. It’s amazing that something so easy tastes so wonderful. Make a double batch of the filling and freeze for later or bake a second pie to share.
If you enjoyed this little cherry pie you might also like to try my single-serving pumpkin pie recipe, single serving apple crisp, mini banana cream pie, and the summer fresh strawberry pie for one or this individual-sized strawberry custard pie. Check out these easy cherry turnovers made with puff pastry.
Would you like to save this recipe?
Ingredients Notes
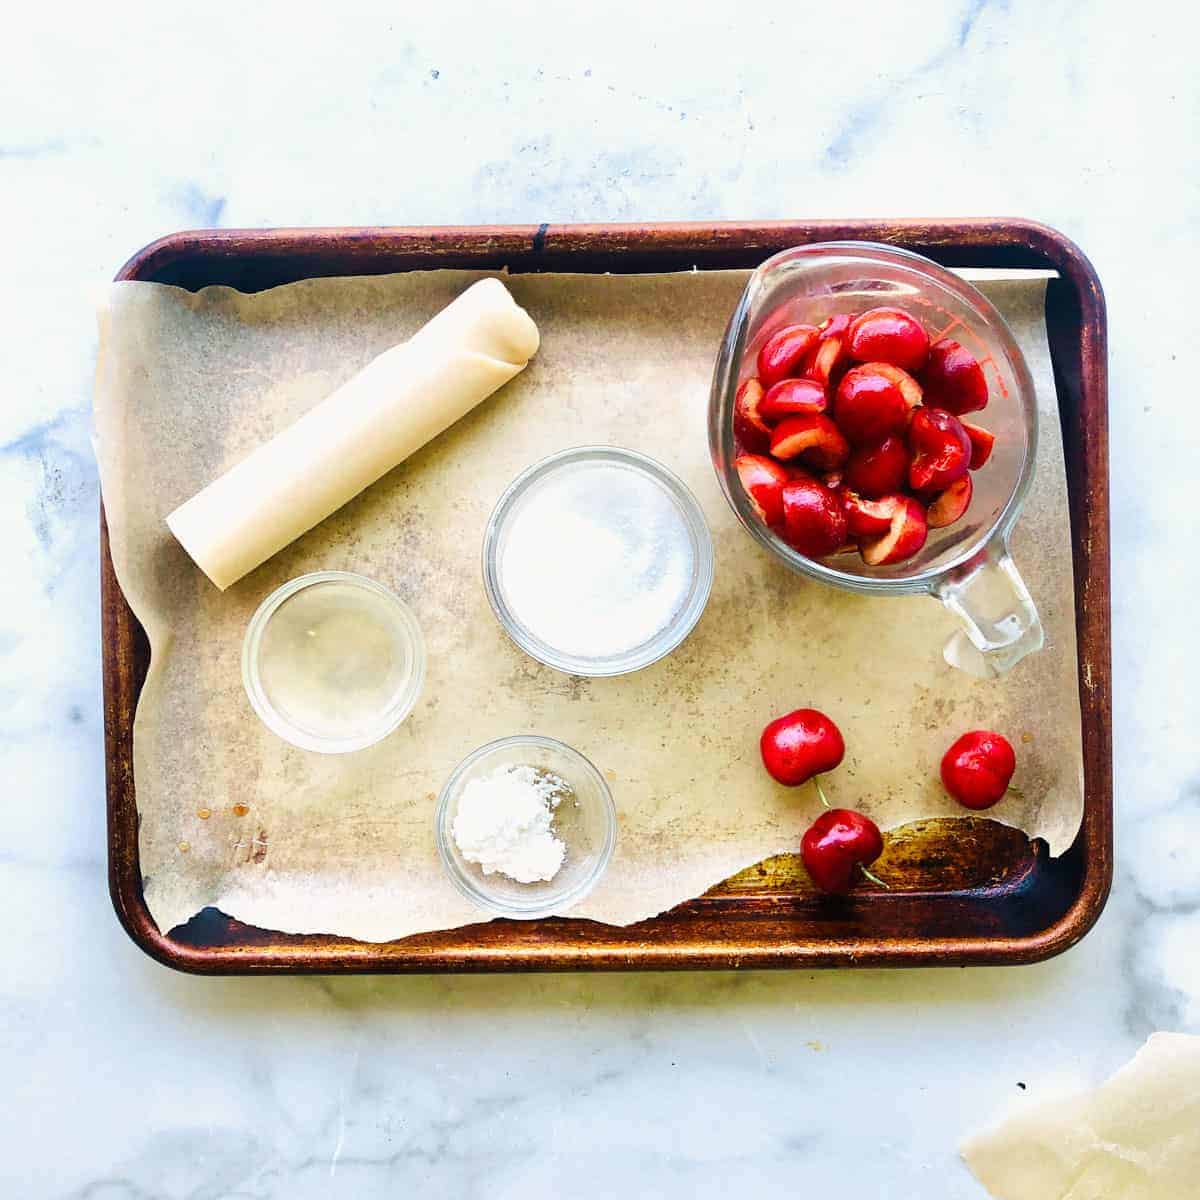
- Pie Crust: You can use a refrigerated pie crust like Pillsbury or make your own easy rustic pie crust. If you use a Pillsbury crust you need just a 1/2 sheet. Cut out a 6-inch circle and then re-roll the remaining crust for the top crust or cut into lattice strips.
- Cherries: Summer cherries are perfect for this homemade pie. Use a tart or a sweet cherry.
- Sugar: white granulated sugar should be used.
- Lemon Juice: Freshly squeezed lemon has the best flavor, but you can use bottled lemon juice in a pinch.
- Cornstarch: This is used as a thickener.
Recipe Directions
(Note: please see the recipe card at the bottom of the post for the complete written instructions.)
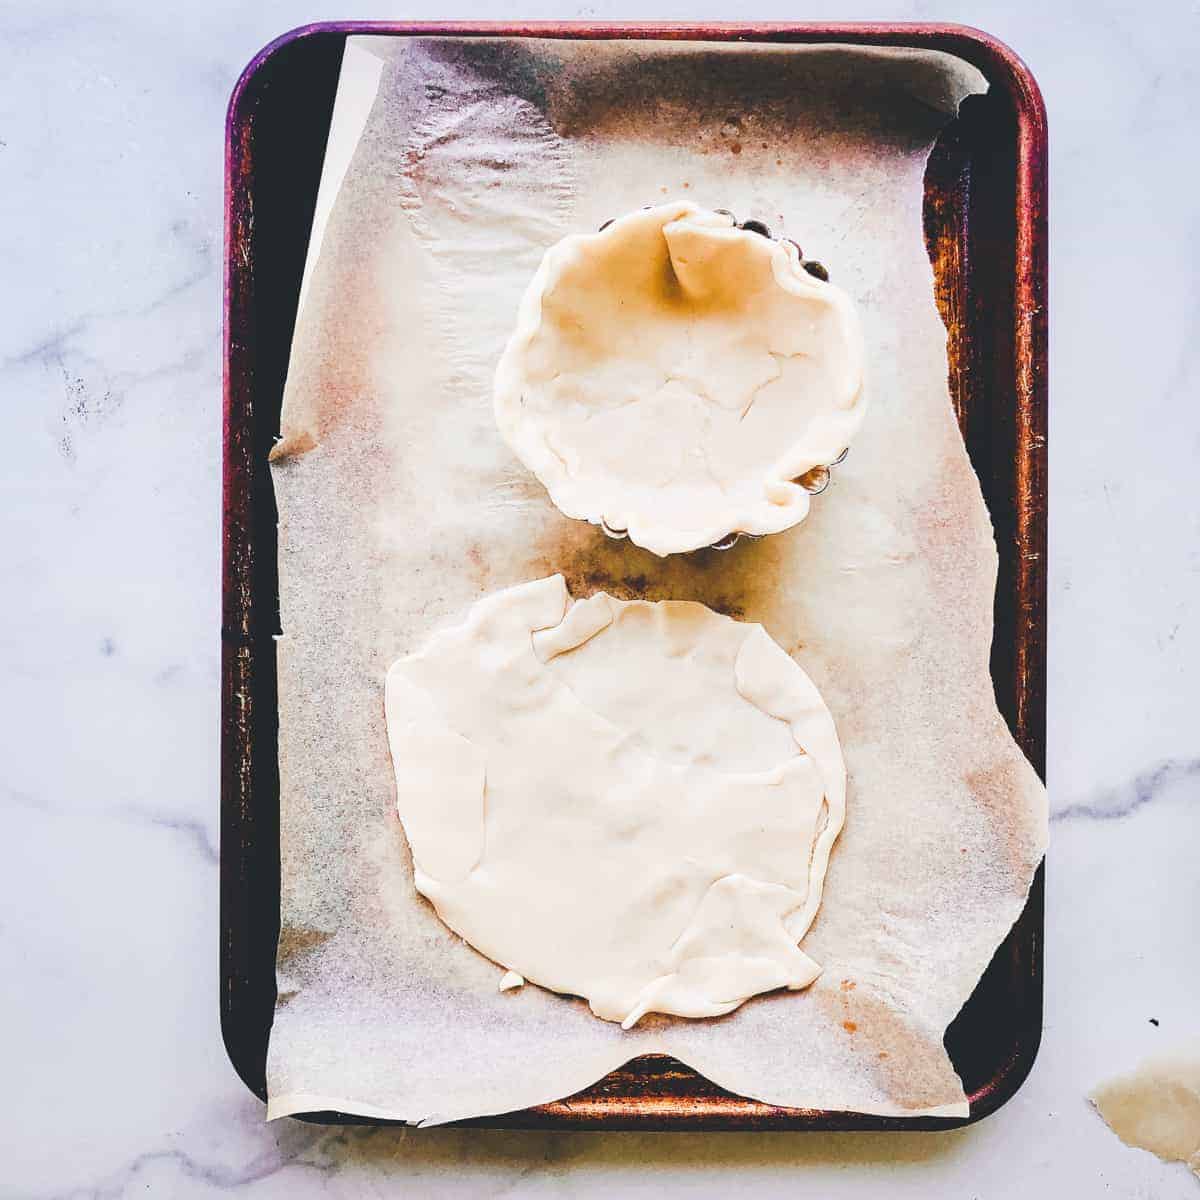
Step One: Prepare the rustic pie crust or use a pre-made crust. Cut the pie crust into two 6-inch circles. Place the bottom crust in a 4-inch pie or tart pan and set aside.
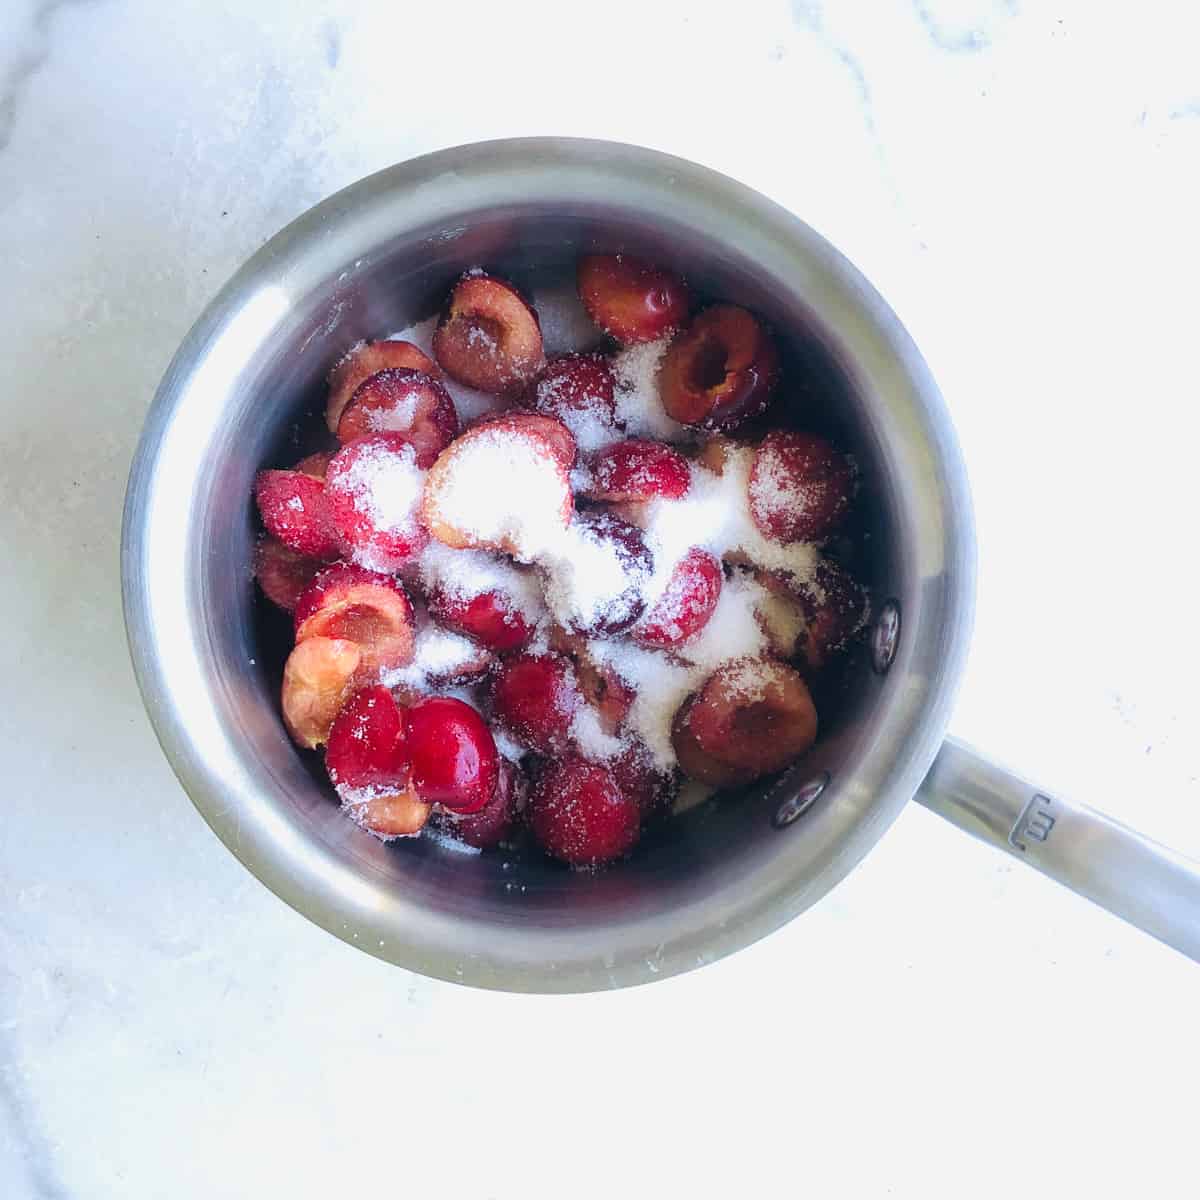
Step Two: In a small saucepan add the cherries, sugar, cornstarch, and lemon juice. Let sit for a few minutes for the cherries to release some of their juices.
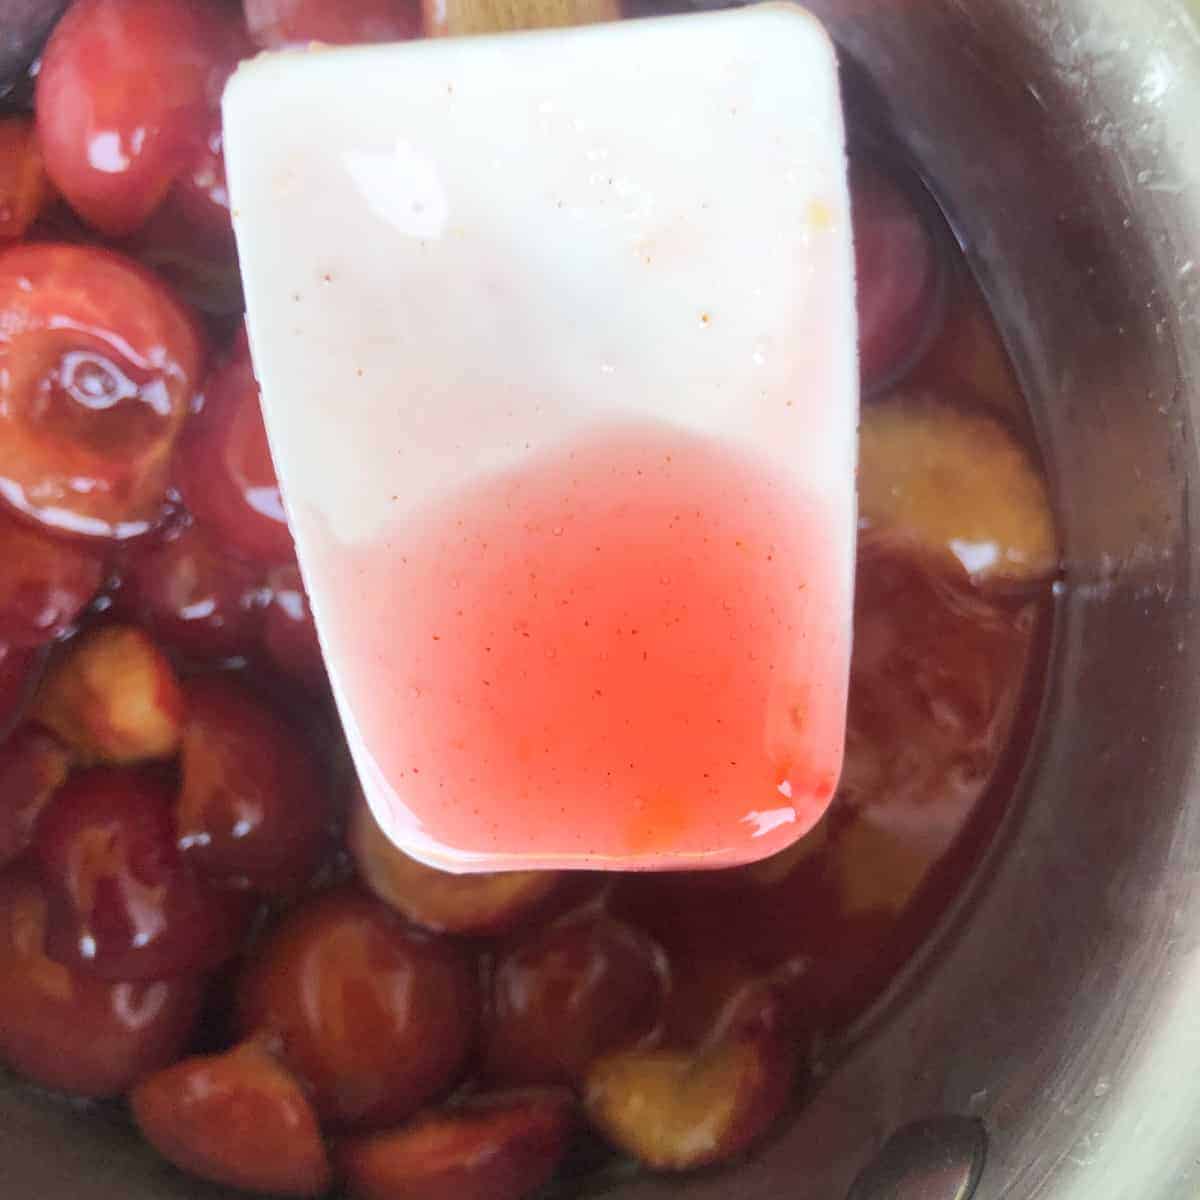
Step Three: Over medium heat, cook the cherries until begins to boil and then reduce the mixture to low and continue cooking for about 2-3 minutes, stirring frequently to avoid scorching.

Step Four: Remove from heat and let cool before adding the filling to the prepared pie.
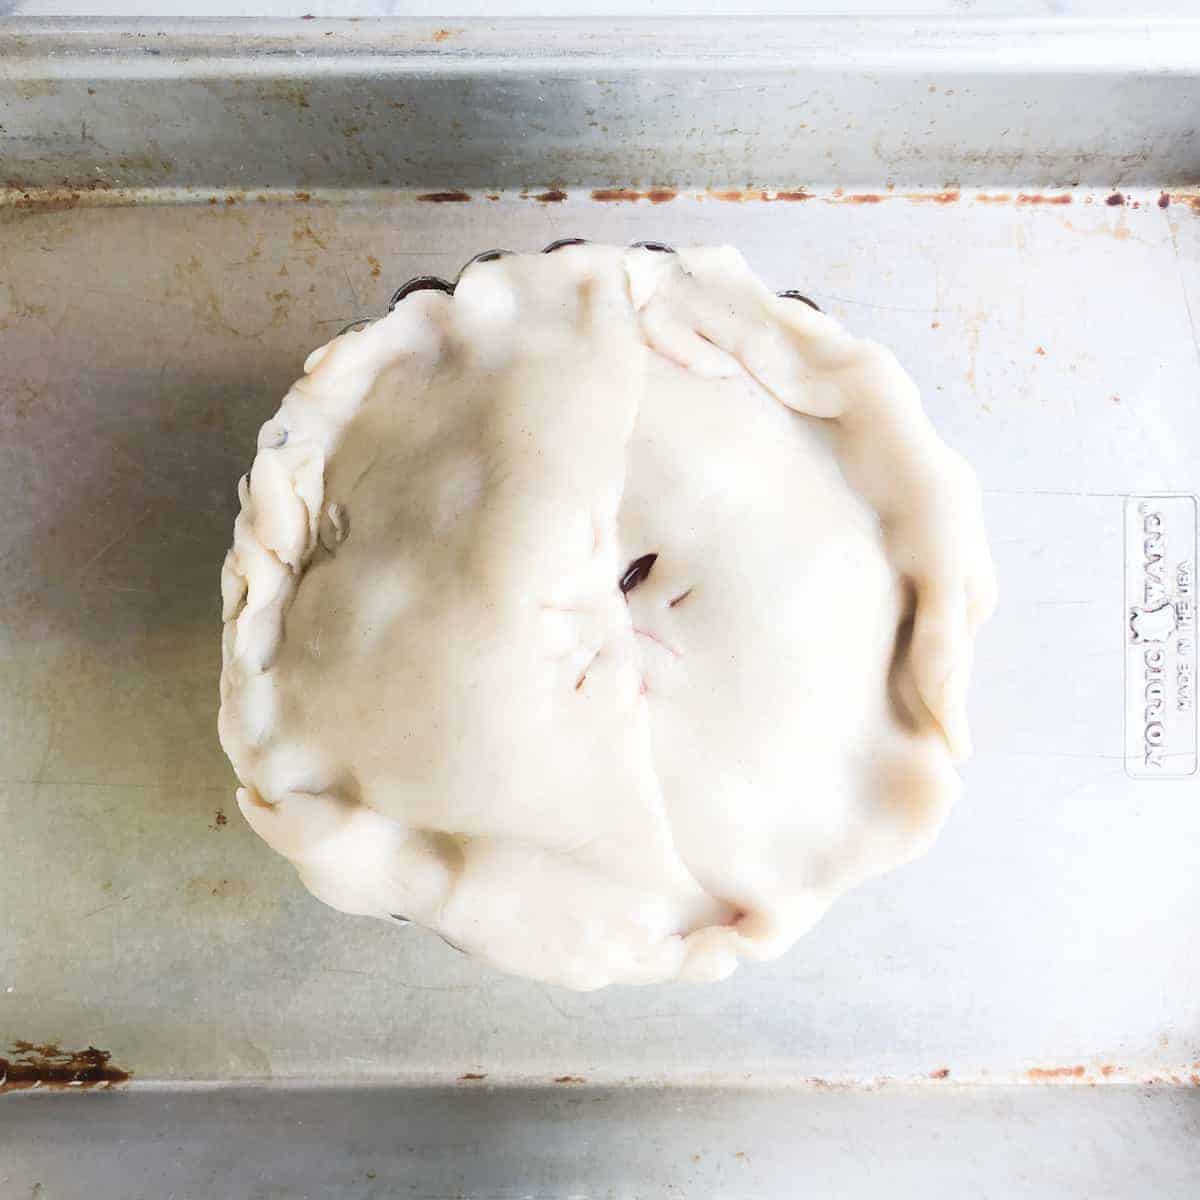
Step Five: Top the filled pie with the second crust And crimp the edges to close. Poke a couple of venting holes in the top crust.
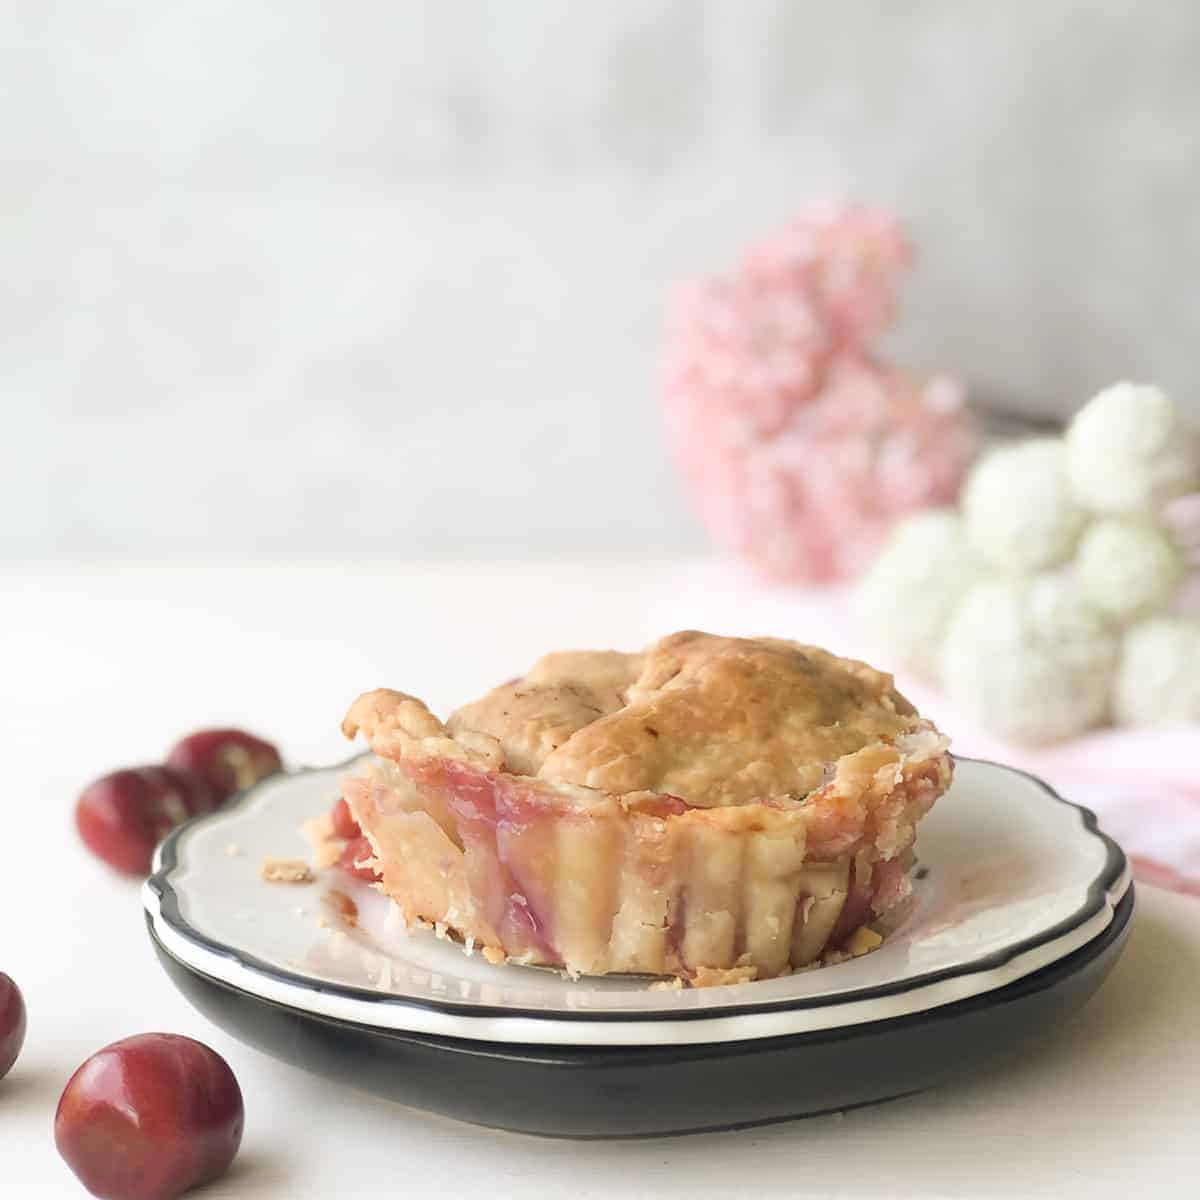
Step Six: Place pie on a small baking sheet and bake at 375 F for 40-45 minutes until the pie crust is browned and the filling is bubbly.
Top Tip: Gently crush the cherry with the side of a knife to open up the cherry and easily remove the pit and stem.
Recommended Tools
The following are affiliate links to find these items on Amazon
- Small Saucepan – My made-in butter warmer is the perfect size for making small batch fillings. I use my made-in pan frequently and it’s very well made. Being a bit bigger than other butter warmers the size makes this a versatile and must-have pan for the solo cook.
- Lemon Juicer – I use this wood juicer all the time.
- Small Spatula – My spatula set fits perfectly inside the small pan.
- 4-inch tart or pie pans – These are perfect for making pies, and quiches.
Mini Cherry Pie: Frequently Asked Questions
When making a mini cherry pie, fresh is the best and the most efficient and less wasteful way of making your pie. By using fresh you are making the exact amount you need. Another great reason is you can better control the amount of sugar.
Did you make this recipe? I would love it if you left a comment or review! Be sure to sign up for the email list and follow “A Weekend Cook” on Pinterest and my Facebook page.

Mini Cherry Pie
Ingredients
Recipe Directions
- Prepare the rustic pie crust or use a pre-made crust. Cut the pie crust into two 6-inch circles. Place the bottom crust in a 4-inch pie or tart pan and set aside.
- n a small saucepan add the cherries, sugar, cornstarch, and lemon juice. Let sit for a few minutes for the cherries to release some of their juices.
- Over medium heat, cook the cherries to boiling then reduce the rest to low and continue cooking for about 2-3 minutes, stirring frequently to avoid scorching.
- Remove from heat and let cool before adding the filling to the prepared pie.
- Top the filled pie with the second crust And crimp the edges to close. Poke a couple of venting holes in the top crust.
- Place pie on a small baking sheet and bake at 375 F for 40-4 minutes until the pie crust is browned and the filling is bubbly.
Would you like to save this recipe?
Nutrition
Notes
- Gently crush the cherry with the side of knife to open up the cherry and easily remove the pit and stem.
- Add a small amount of water for the cherry mixture is too dry.
- If using frozen berries, thaw completely before cooking.
- Wrap the edges of the unbaked pie with foil to avoid over-browning the edges, and remove the foil halfway through baking.
- When making a mini cherry pie, fresh is the best and the most efficient and less wasteful way of making your pie. By using fresh you are making the exact amount you need. Another great reason is you can better control the amount of sugar.
Your Private Recipe Notes
Get new recipes by email
Subscribe to get new posts delivered to your inbox.