
This easy Amish white bread recipe makes one soft, slightly sweet loaf with simple pantry ingredients and no stand mixer required! It’s an easy homemade sandwich bread for beginner bakers and anyone who doesn’t need two full loaves.
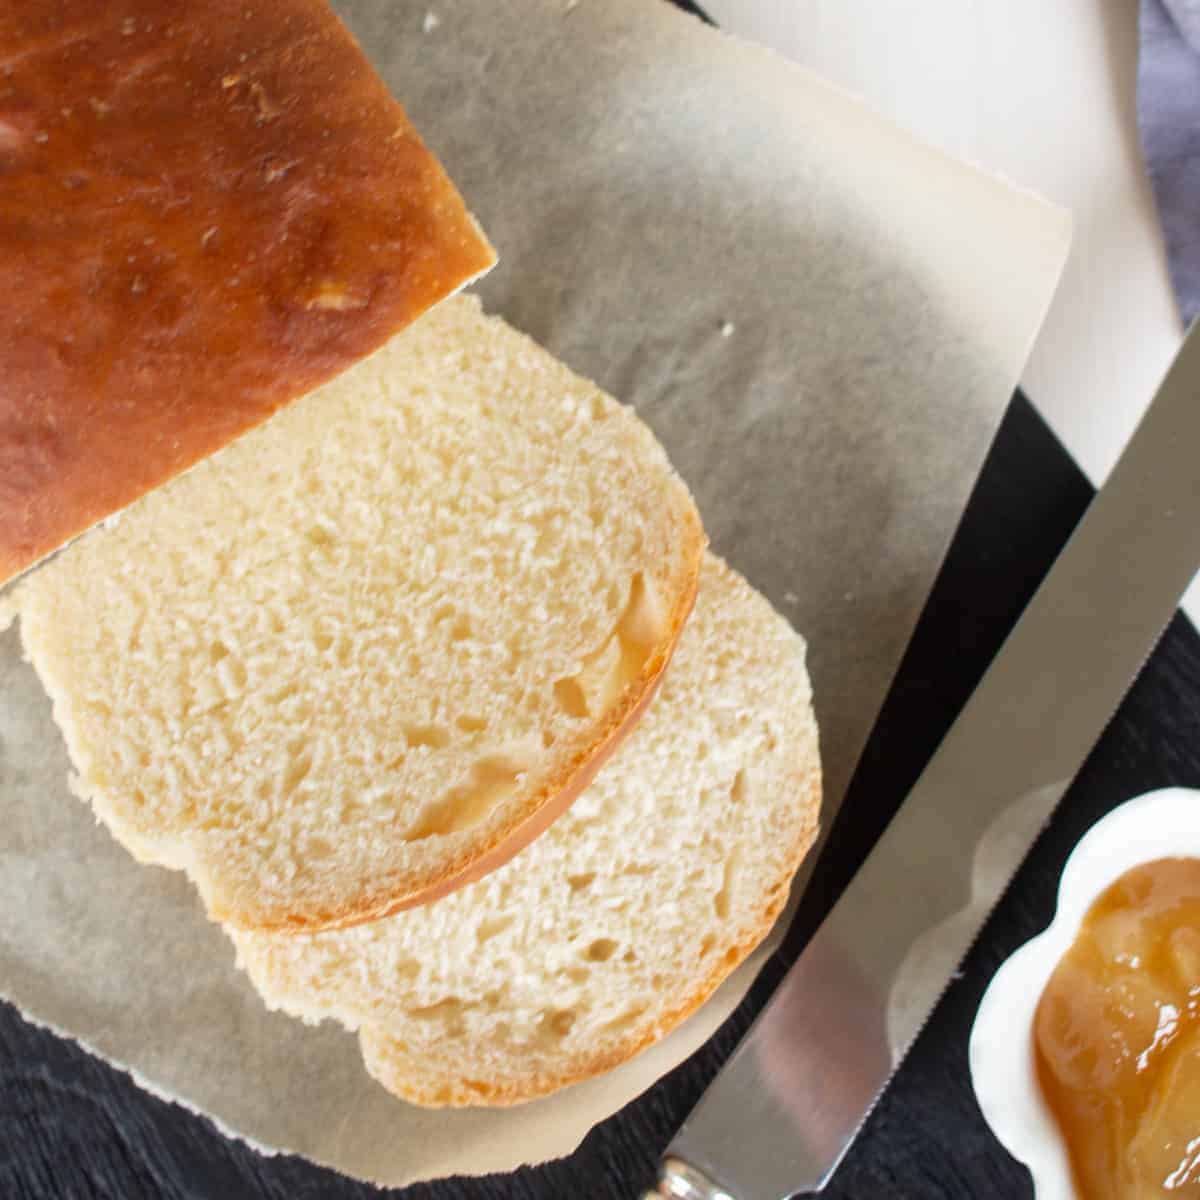
This is one bowl, one wooden spoon, and a loaf pan. That’s it. And it comes out soft, a little sweet, with just enough crust to make your grilled cheese sandwich hit different. I’m not exaggerating when I say this bread turned me into a “sure, I’ll just whip up a loaf” person.
Why you’ll want to make this
Because it’s basically foolproof, that’s why. The first time I made this, it came out perfect; no fussing, no “well that didn’t rise” disasters. If you’ve been intimidated by bread baking, this is your gateway loaf. Toast it, slather it with jam, use it for weekend French toast, whatever you want , just don’t let it go to waste on store-bought bread duty ever again.
🧽 Dish Duty: Standard — You’ll use one mixing bowl, a wooden spoon or dough whisk, and a loaf pan, plus a lightly floured surface for kneading. Cleanup is pretty straightforward for homemade bread.
What you’ll need (nothing fancy, promise)
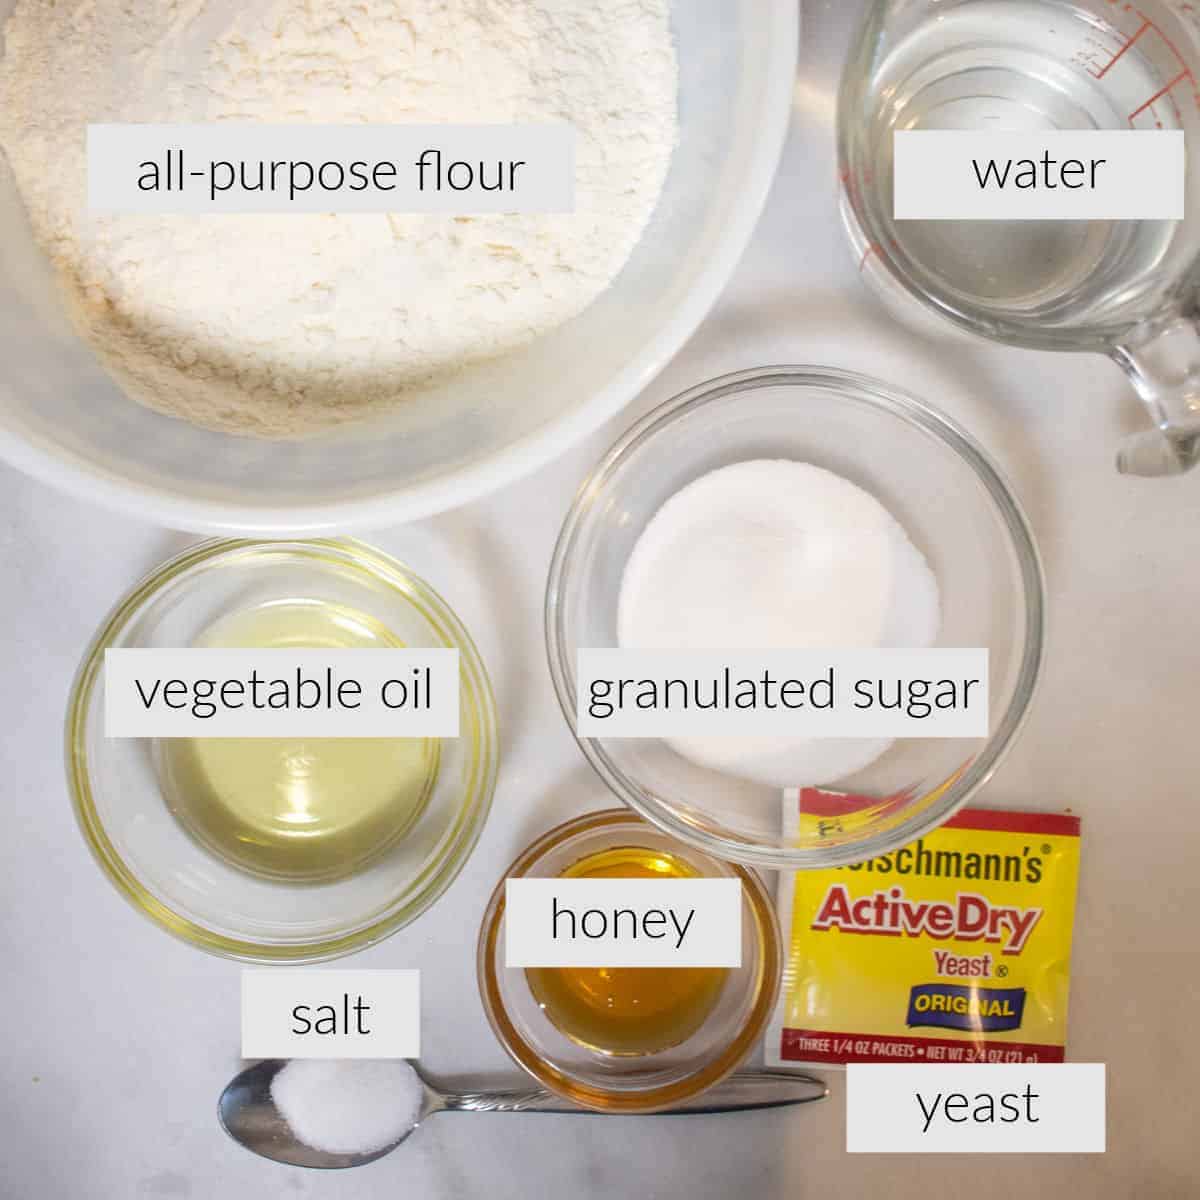
Warm water — key word warm, not hot. Too hot and you’ll kill your yeast before it even gets started.
Sugar and honey — I like using both, but you can lean on just one if that’s what’s in your pantry.Active dry yeast — grab a fresh packet. I haven’t tested this one with instant or rapid-rise, so stick with active dry here.
Kosher salt — fine kosher salt, not table salt. Table salt gives it a weird edge, or at least it does to my taste buds.
Vegetable oil — something neutral, like canola.
All-purpose flour — regular all-purpose, not bread flour. This recipe was built around AP flour, so let’s not overthink it.
Butter — just a touch, for brushing that crust at the end.
My recipe version does not use any mixer and is very easy to make with the simple tools you probably already have. Using a stand mixer will give you that smoother dough, but I found it doesn’t really make any flavor difference. A wooden spoon or a dough whisk if really wanna get fancy, a bowl, a kitchen towel, a loaf pan, and some measuring spoons and cup.
Wooden Spoon or Dough Whisk: A wooden spoon is really the workhorse of the kitchen, and if you have one, then most of the time, you don’t need a mixer, especially when making small batch dough. A dough whisk is also handy if you mix a lot of batters and dough.
Let’s make some bread!
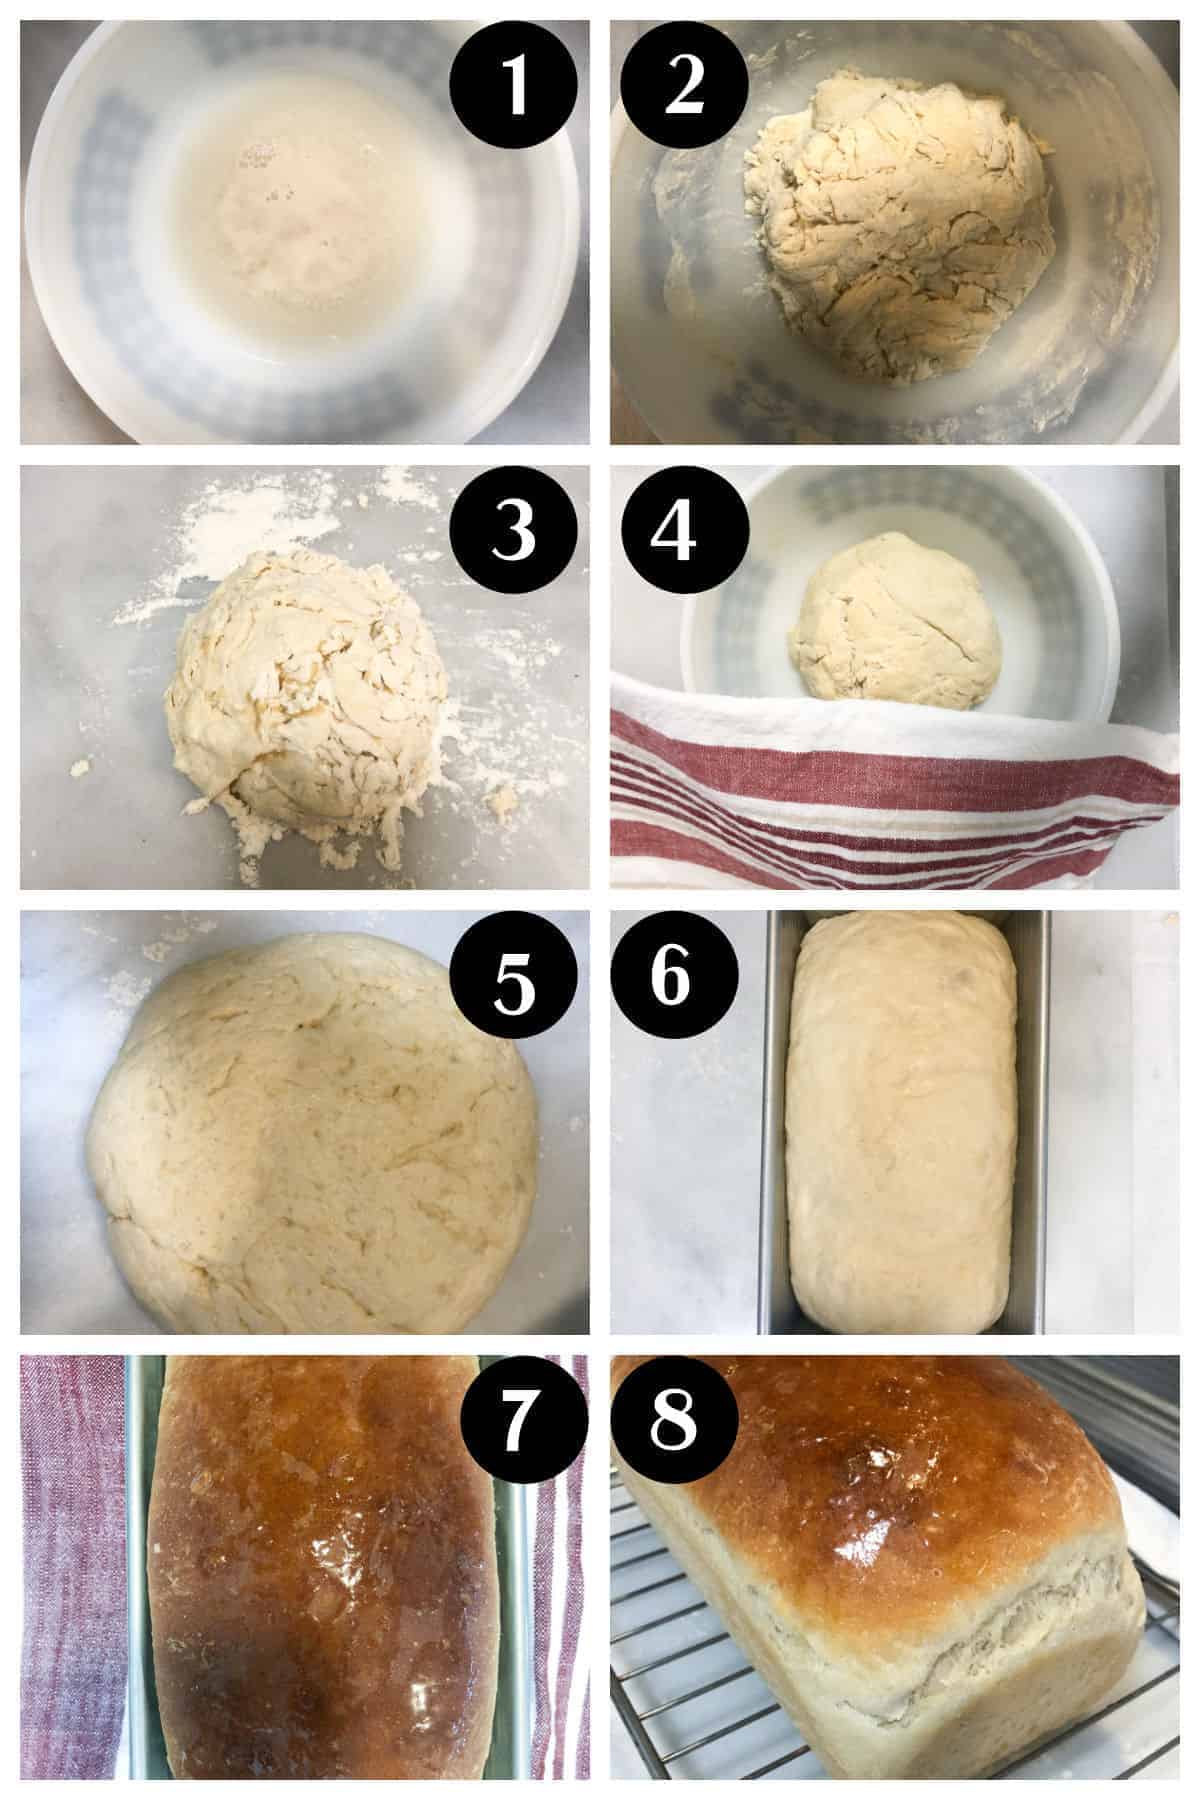
- Wake up your yeast. Stir the sugar into your warm water until it dissolves, then stir in the yeast. Let it sit for about 5 minutes — you’re looking for it to get a little foamy on top. If nothing happens, your yeast is dead and you need a new packet. No shame, it happens.
- Bring it together. Stir in the oil (and honey if you’re using it), then the salt, then add your flour a cup at a time. Mix with a wooden spoon or dough whisk until it forms a dough ball. You could use a mixer here, but honestly, mixing by hand is kind of therapeutic.
- Knead it — and actually pay attention here. This is the step people rush, and it’s the one that makes or breaks your loaf (pun very much intended). Turn the dough onto a floured surface and knead for about 3-5 minutes, until it’s smooth and bounces back when you poke it. Under-knead it and your bread won’t rise right. Over-knead it and you’ll end up with a tough, chewy loaf. Give it your full attention for these few minutes and you’ll be fine.
- First rise. Oil up a glass or stainless bowl, turn your dough ball around in it to coat all sides, then cover with a damp cloth. Let it hang out somewhere warm for an hour ; it should roughly double.
- Shape it up. Punch the dough down (very satisfying, by the way), shape it into a loaf, and tuck it into a lightly oiled loaf pan. Let it rise again for 40-45 minutes.
- Bake. 350°F for 30 minutes, until that crust turns a beautiful golden brown.
- Butter it while it’s hot. Brush the top with a little butter as soon as it comes out. Let it sit in the pan for 5 minutes.
- Cool completely before slicing. I know, I know — the smell alone makes this the hardest step. But slicing into it too early gives you a gummy center, so let it fully cool on a wire rack first.
A few things I’ve learned the hard way
- The dough likes it cozy. 75-78°F is the sweet spot for rising. If your kitchen runs cold, I just preheat my countertop oven a bit and let the dough rise on top of it — enough warmth radiates up without cooking anything.
- Check your yeast’s expiration date. Old yeast is the number one reason bread doesn’t rise. Don’t skip this.
- Don’t rush the rises. I know it’s tempting, but the dough needs that time to actually double.
- Preheat your oven properly. Popping the bread in before the oven’s fully up to temp messes with your rise and your crust.
- Tap test for doneness. A fully baked loaf sounds hollow when you tap the bottom.
How to keep it fresh
Store it unsliced in a linen bread bag, or wrapped in a linen napkin inside a paper bag , it’ll stay good for about 3 days that way. Not going to eat it all in time? Wrap the cooled loaf tightly in plastic and freeze it for up to a month.
Quick answers to stuff people ask me
Why do you punch the dough down?
It releases the air so you can knead it properly and shape it into a loaf without big air pockets messing up the structure.
Why is my bread gooey in the middle?
Either it needed more time to cool (it’s still technically cooking as it cools) or it just needed a bit more time in the oven.
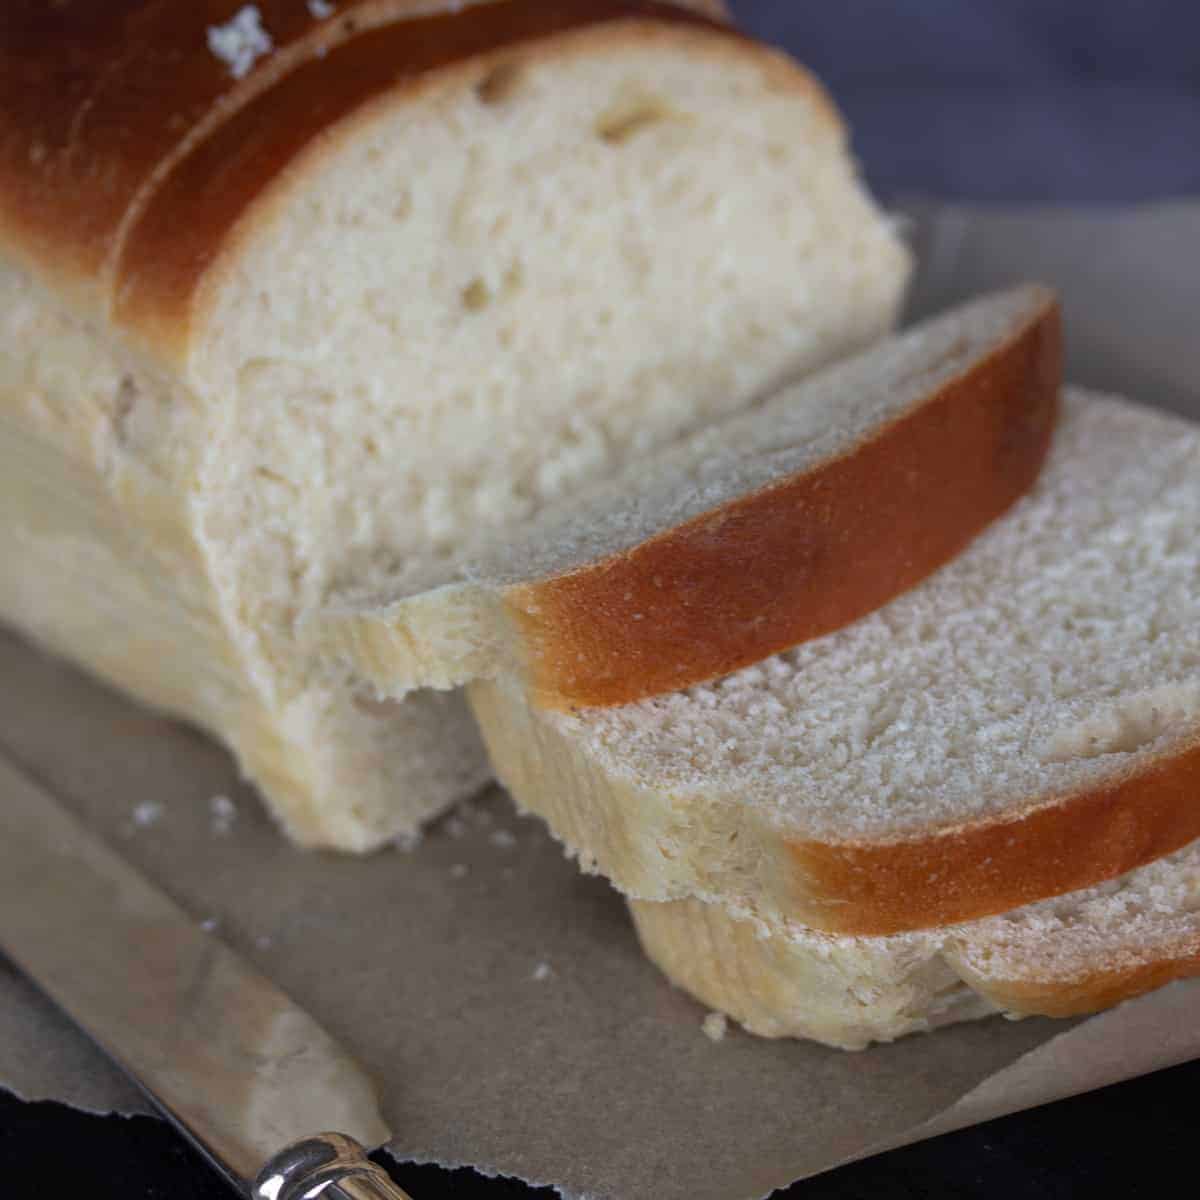
Amish White Bread
Ingredients
Recipe Directions
- In a medium bowl, dissolve the sugar in warm water. Once dissolved, stir in the yeast. Let sit for about 5 minutes until it becomes slightly foamy..
- Add the oil and honey, if using, and stir. Stir in the salt, then add the flour one cup at a time. Use a wooden spoon or dough whisk to mix until a dough ball forms
- Turn the dough onto a lightly floured surface and knead until smooth, takes about 3-5 minutes.
- Lightly spray the inside of a glass bowl with oil and place the dough in the bowl, turning to coat all sides of dough ball. Cover with a warm damp cloth and let sit for 1 hour. The dough will rise to about double in size.
- Remove the dough from the bowl and punch it down. Shape it into a loaf and place it in a lightly oiled loaf pan. Let rise again for 40–45 minutes.
- Bake at 350 °F for 30 minutes, until the crust turns golden brown.
- Remove from the oven and brush the top of the loaf with butter. Let it cool in the pan for 5 minutes.
- Turn the loaf out onto a wire rack and cool completely before slicing.
Nutrition
Notes
Your Private Recipe Notes
💵 Estimated Cost – Basic Bread Dough (Single Loaf)
| Total Estimated Cost (without honey) | | | $1.12 | | Total Estimated Cost (with honey) | | | $1.32 |
This is so good so soft and delish if I could give it a 10 Stars I would
I’m so glad you enjoyed the recipe!
This one is going in my recipe box! So easy and so delicious 😋
My husband loves this bread for sandwichs
it would be nice if your measurements were also in metric.
i have learned that a cup is not the same size in the US as in the UK.
Being from Switzerland, we use metrics. saves on errors.
thanks!
There is a toggle located next the Ingredients heading which can be selected to change to metric measurement. Cheers.
I wish bakers listed how they measured their flour. Especially for a beginner would be so helpful. There is a difference in scoping, spooning and weighing your flour. Don’t mean any disrespect. It’s just in these times ( the rising cost of things) you don’t want to chance a failure. Saving your recipe and will be trying. Sounds delicious.
You make an excellent point! I normally spoon when measuring recipes for the blog, I have not included weights because I was thinking most casual bakers might not have a scale. I think going forward I’ll include the measuring method as well as weights and cup equivalents. Cheers!
I fluff my flour before I scoop so it doesn’t become over packed. I just do it with the measuring cup. Spoon measuring is a good way too. I just like the fluff method.
We really like this bread with and with our honey!
A friend sent this recipe to me, tried to find it on my online search but it did not show up anywhere. This really, is the best recipe I’ve tried. I don’t cook for a crowd so want one loaf recipe, check, easy, no stand mixer needed, and easy to mix dough by hand, check, and flavorful, check! Thanks so much, this one is a keeper. 🙂
Hi Lillian,
I’m so glad you enjoy the recipe, it’s my go to for homemade bread. You should also try the ciabatta rolls!
This recipe was so good! My husband made a grilled cheese sandwich and said the bread was so flavorful, it was the best grilled cheese he ever had.
made today..perfect…
What is the honey in the list of ingredients used for? I didn’t see it in the instructions.
Hi Susanne,
The honey is optional, I updated the card to indicate that if used you should add it in at step 2. Thank you for asking!