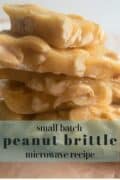

A crisp, buttery peanut brittle that’s perfect for gifting, (or just a little treat for yourself). This small-batch version cooks fast in the microwave sets quickly, and breaks into golden glassy pieces and no candy thermometer needed!.
Would you like to save this recipe?
What makes this recipe special
- Quick: Ready in about 10 minutes of hands‑on cooking time.
- Small‑batch: Makes just enough to enjoy without eating peanut brittle for a month.
- Beginner‑friendly: No stove top, no special equipment, and clear step‑by‑step cues.
- Classic flavor: Sweet, salty, and ultra‑crisp with that nostalgic brittle snap.
Ingredient Notes
- Granulated sugar (¾ cup / ~150 g): The backbone of the brittle.
- Light corn syrup (⅓ cup / ~110–115 g): Helps prevent crystallization and keeps the texture glassy and crisp.
- Roasted salted peanuts (1 cup / ~135–150 g): Salted adds great contrast; use unsalted and add a pinch of salt if preferred. Dry‑roasted or cocktail peanuts both work.
- Butter (¾ teaspoon / ~4 g): Adds flavor and a touch of richness. Unsalted or salted are both fine.
- Vanilla extract (¾ teaspoon): Warm, bakery‑style aromatics.
- Baking soda (½ teaspoon): Creates tiny bubbles for that light, brittle texture.
Allergy note: This recipe contains peanuts. Substitute roasted almonds, cashews, or pistachios for a fun twist (keep the same amount and chop larger nuts)
Microwave Wattage Time Guide (Quick Reference)
- 700 W (baseline): 3:00 → +3:00 → +1:00 → +0:15–0:20
- 1000 W: ~2:30 → +2:30 → +0:45 → +0:10–0:15
- 1100–1200 W: ~2:15 → +2:15 → +0:40 → +0:10
These are guidelines. Visual cues matter most: light amber color and a smooth, syrupy consistency before adding baking soda.
Pro Tips for Perfect Brittle
- Line & lube: Line the pan before you start and lightly spray your spatula so spreading is effortless.
- Thin is in: The thinner the layer, the crisper the snap.
- Color check: You’re aiming for light amber—too pale can be sticky; too dark tastes bitter.
- Thermometer optional: If using one, aim for ~300°F (hard crack) before the baking soda step.
- Work quickly: Once baking soda goes in, pour and spread immediately.
How to Store
- Room temp: Store fully cooled brittle in an airtight container with parchment between layers for up to 3–4 weeks.
- Freeze: Wrap tightly and freeze up to 2 months. Thaw, still wrapped, at room temp.
- Avoid the fridge: Humidity softens brittle.
How long does it take for peanut brittle to harden?
Peanut brittle will usually harden in about 30 minutes. Cool on the counter, no need to refrigerate the brittle to set it.
Troubleshooting & FAQs
Why is my brittle sticky or chewy?
It probably didn’t reach hard‑crack (~300°F). Microwave a bit longer next time and watch for the light‑amber color.
Can I use unsalted peanuts?
Yes—add a small pinch of salt to the syrup for balance.
How long does it take to set?
Usually ~30 minutes at room temperature.
Can I double or halve it?
Yes. Doubling may require a larger bowl and slightly longer times. For halving, use a smaller pan and reduce times modestly; rely on color/texture cues.
.For more peanut recipes check out my peanut butter cookies and homemade peanut butter.
Microwave Peanut Brittle
Ingredients
Recipe Directions
- In a glass 2 cup measuring cup combine and stir together the sugar and corn syrup.
- Microwave on full power for 3 minutes. The time is for a 700-watt microwave, yours may take a shorter time depending on the wattage of your microwave.
- Carefully remove the measuring cup from the microwave and stir in the peanuts. Return to microwave and heat on 100% power for another 3 minutes
- Next, remove the measuring cup from the microwave and stir in the butter and vanilla. return the mixture to the microwave and heat for 1 more minute.
- Next, stir in the baking soda to the measuring cup and microwave for another for about 15 to 20 seconds
- Let the mixture sit until it stops bubbly and settles down.
- Pour the mixture onto a parchment-lined small rimmed baking sheet. Smooth out with a scraper or the back of a spoon coated with a non-stick spray. Allow the candy to cool completely.
- When candy is cooled completely, lift out by the edges of the parchment paper and cut with a sharp knife or use a hammer to break apart.